
- Soil sampling and testing on a small property
Page last updated: Monday, 2 November 2020 – 8:51am
Accurate soil tests allow small landholders to maximise the health of their soils and make sound decisions about fertiliser management to ensure crops and pastures are as productive as possible.
Identifying potential soil limitations enables landholders to develop an action plan (such as an appropriate fertiliser program) to reduce the potential of ‘problem’ paddocks.

Soil health looks at all aspects of the soil together, including the physical, chemical and biological components, rather than each component separately.
Healthy soil requires a balance between inputs and outputs and regular soil tests provide a valuable monitoring tool to keep an eye on soil nutrient levels and other key characteristics such as pH and salinity.
A soil imbalance can affect the ability of plants to absorb any applied fertiliser, wasting time and money.
A combination of soil tests, on-farm observations and historical records will assist in determining soil health.
Soil testing is a useful tool to provide information to support decisions about fertiliser application, however it is important to combine test results with other information, such as specific crop or pasture requirements, available funds and fertiliser cost, methods of application and potential income from the crop or pasture being grown.
Accurate results
Soil test results are only as accurate as the samples taken from the paddock and how they are handled leading up to laboratory analysis. If the samples do not truly reflect the soils in a certain paddock the test results are likely to suggest an inaccurate picture of soil fertility.
Sampling not only depends on how the sample is taken but when and where.
There are four main steps in soil sampling:
- collecting representative samples
- laboratory analysis
- interpretation of test results on which to make decisions
- recording the results and actions taken for future reference.
Taking the test
There is more to soil testing than analysing the soil’s nutrient status. The process incorporates the sampling procedure, soil analysis and interpretation of the results leading to a sound recommendation.
Before collecting soil samples consult a local agronomist to discuss the need for additional tests such as deep soil nitrogen tests. In most soils the nutrients are concentrated in the top 10cm of soil, so ensure samples are consistently taken to this depth.
When to collect samples
Changes in soil moisture, plant growth stage and decomposition of organic matter all affect soil nutrient levels. For example, available nutrients can be low in soil samples collected during spring as nutrients are still in the plant and are not returned to the soil until after decomposition.
Check with your local agronomist as to the best time to collect soil samples in your area. Most comparisons are based on mid–summer (January to March) sampling when the soil is dry.
Regular tests build better profile
Because many factors influence soil test results, soil analysis for one season is not conclusive. Subtle differences in soil type can impact significantly on the availability and exchange of nutrients between the soil and plants so it is important to test soil regularly.
Testing the soil at the same time each year improves the comparison of results between years and builds a clear profile of soil health over time.
It is also important to send samples to the same laboratory for testing as results between laboratories cannot be compared easily.
Collect enough samples to make up a representative picture of a paddock. It is better to over-sample, as this will provide a more accurate picture of the soil and will help reduce unnecessary fertiliser application.
Selecting your samples
Sampling often limits the success of soil testing. One hectare of soil to a depth of 10cm contains about 1300t of soil. A 10g subsample sent to a laboratory represents only one part in 1300 million. So ensure your samples are representative.
To increase test result accuracy avoid sampling soil near fences, trees, troughs, headlands, dams, stock tracks and clumps of manure, fertiliser dumps, fertiliser bands from the previous year, burnt heaps, areas of abnormally good or poor growth or poorly drained areas.
Also avoid collecting samples from areas where fertiliser, gypsum or lime have been applied during the preceding three months.
Wet soil can alter test results due to microbial activity and mineralisation.
Account for variability
Variability of soil is often overlooked.
Most soils in Western Australia (WA) are not uniform and comprise different soil types and slopes. Even individual paddocks often have variations in soil surface depth, soil type and nutrient levels, which can be significant over relatively short distances.
Many soil types can be found in a single paddock. This, combined with management practices, can lead to varying nutrient levels within and across paddocks.
Even if the paddock has a uniform single soil type, stock can spread nutrients unevenly through urine and dung. Management can concentrate or spread nutrients through clearing, burning, grazing or hay production.
Where soil differences within a paddock are obvious and areas can be treated differently, take separate samples from each area.
Where there is more than one soil type, take about 20 cores from each major soil type. Ensure each soil type is sampled and labelled separately to allow for individual analysis.
To increase productivity on larger properties it is worthwhile classifying the land and soil types and ensuring samples are only collected from within a specific land and soil type.
Sampling sites
Take samples from across a paddock using a dedicated soil sampling tube or ‘pogo’. Take at least five (preferably more) samples per hectare, covering the entire area.
Keep in mind that a hectare is 100m by 100m and to take five samples diagonally will involve taking samples about 30m apart in a zig-zag pattern.
If the paddock is predominantly of one soil type take at least 40 cores, each to a depth of 10cm. For each soil type, bulk all samples together, thoroughly mix and take a 500g subsample to be sent to the laboratory with clear labels.
Note in your records the pattern that you used to collect samples. Following the same pattern in future years will provide a clearer picture of soil fertility trends.
Handle with care
Collect cores in a clean plastic bag and label clearly. Do not use second-hand containers or touch soil samples with bare hands as this will contaminate the sample and affect the test results.
Air dry samples by leaving the top of the bag open to the air if there is a delay between sampling and posting. Send samples to the laboratory early in the week if possible to avoid postal delays over weekends.
Prepared soil sampling kits are available from most rural supply stores. If using an off-the shelf kit read the instructions carefully as they may have specific instructions.
Interpreting the results
A number of laboratories are available to test and analyse your soil samples. Some services offer recommendations relating to the test results.
Contact your local agricultural consultant, agronomist or rural supply store for the contact details of available soil testing and support services in your region.
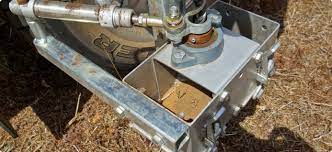
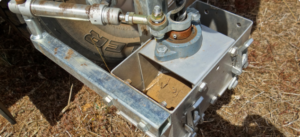
How to take a soil sample
To obtain an accurate soil analysis, the sample cores need to be taken correctly.
Before taking samples, plan how many samples are required and from where they will be collected througout the paddock.
Ensure the stainless steel sampling tube and collection bags (use new bags for each sample) are clean before taking samples, including inside the steel tube. If using oils on clay soils ensure they are free of nitrates and carbon.
Most soil samples are taken from the top 100mm of surface soil. Adjustable soil sampling probes often will have marks at 100mm intervals.
If no mark exists set the depth stop at 100mm using a ruler. It is vital all samples are taken from the same depth.
For large paddocks, plan to take at least 25 cores in a grid or zig-zag pattern as shown. Paddocks of more than 50ha will require more core samples (minimum of 30 cores).
If there are two or three distinct soil types in a paddock of more than 100ha, treat them as separate paddocks. In WA, it is recommended to take 4-8 samples within a paddock (each sample being at least 12-15 cores), each taken from within a land management unit in the paddock.
Before sampling, remove any debris from the soil surface, without disturbing the soil. Do not scuff away any plant material from the surface as this will lead to a loss of surface soil. Push in the sample tube straight until the depth stop contacts the ground.
Half-turn the sample tube and then remove it from the ground, taking care not to lose any soil from the end of the tube.
In light soils, the whole tube might need to be pushed toward the ground and a finger placed over the end of the core while the tube is parallel to the ground to ensure the soil does not fall out.
Place a sample bag over the upper end of the tube and invert as shown, emptying the core into the bag. Tap the tube with the palm of a hand to loosen the core if required.
Soil tests can be a great tool in determining the health of your soils and in turn, maximise their productivity.


